

I'm a full-time working mom, so that means I don't DIY. I buy! So when I do actually find myself picking up a pair of scissors, it definitely needs to be shared with the world! :) I've been wanting to do something with our hallway for a while now, but just couldn't find anything I really liked. So I decided to make something myself using nail string art. I actually really like how it turned out. If you're interested in making something like this yourself, here's how you do it!
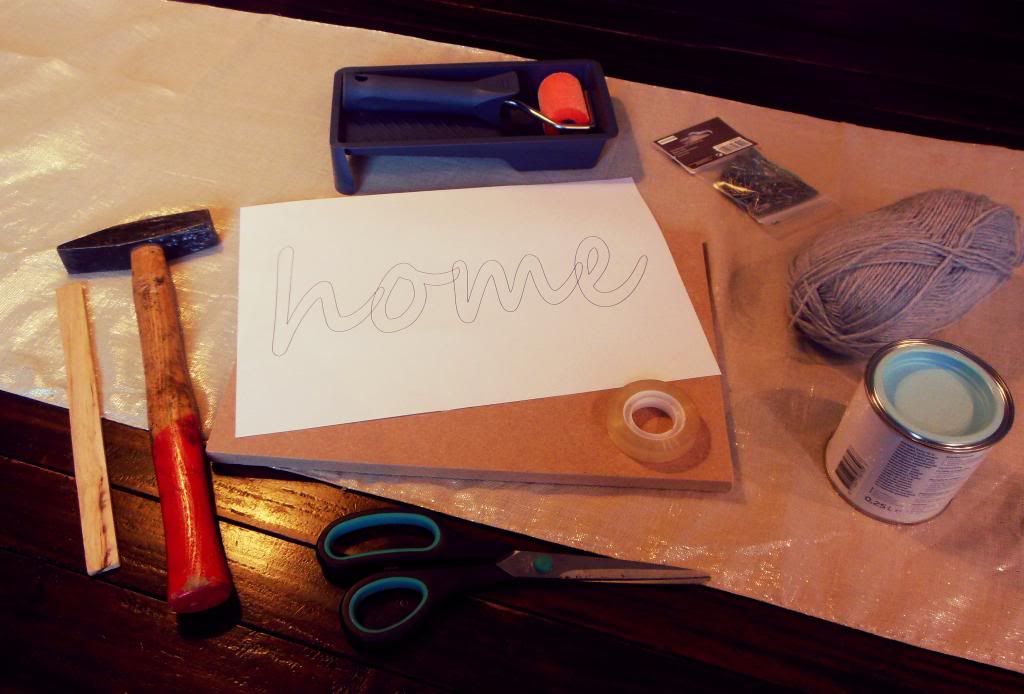
Before you start, make sure you have all your supplies in place. You'll be needing a piece of plywood, paint, a paintroller or brush, yarn, small nails, scissors, tape, a hammer, something to mix your paint with and a piece of paper with your pattern. I also used sandpaper to soften the edges of the plywood a little, but that's not really a necessity.
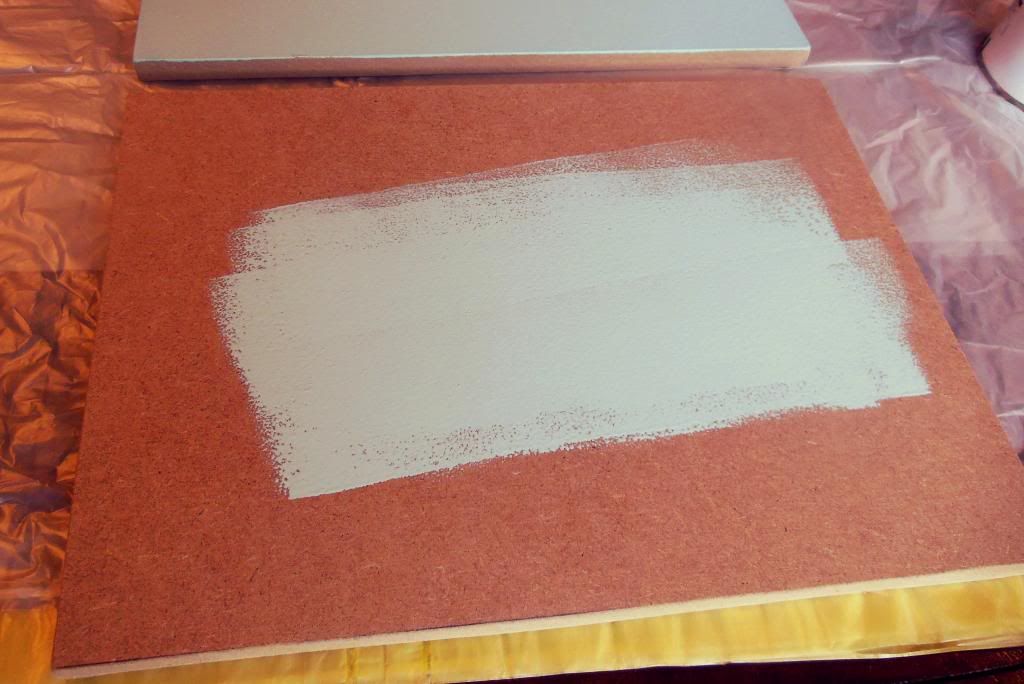
Once you have all your supplies in place, you can start by painting the plywood and letting it dry properly. When it's dry you can place the piece of paper with your pattern on it and secure it with a bit of tape. Now you don't want the tape to pull away any of the paint once you're finished, so make sure it's not too sticky. If it is, stick it on your hand a couple of times before sticking it to the plywood. It will still be sticky enough to secure the paper, but it won't damage your paintwork.
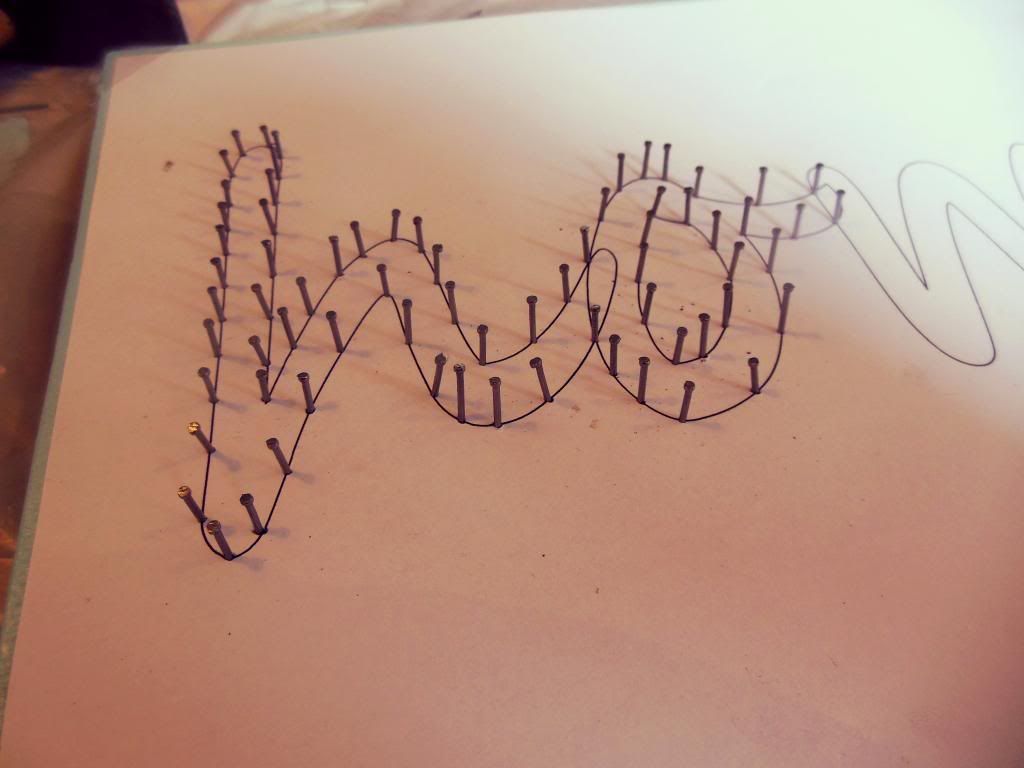
Once you have the paper with your pattern in place, you can start outlining it with the nails. This is the most time-consuming part of the whole project. You want to place them close to each other to maintain a flowing line. Don't hit them too far into the wood, there still needs be enough room on the nail for the yarn.
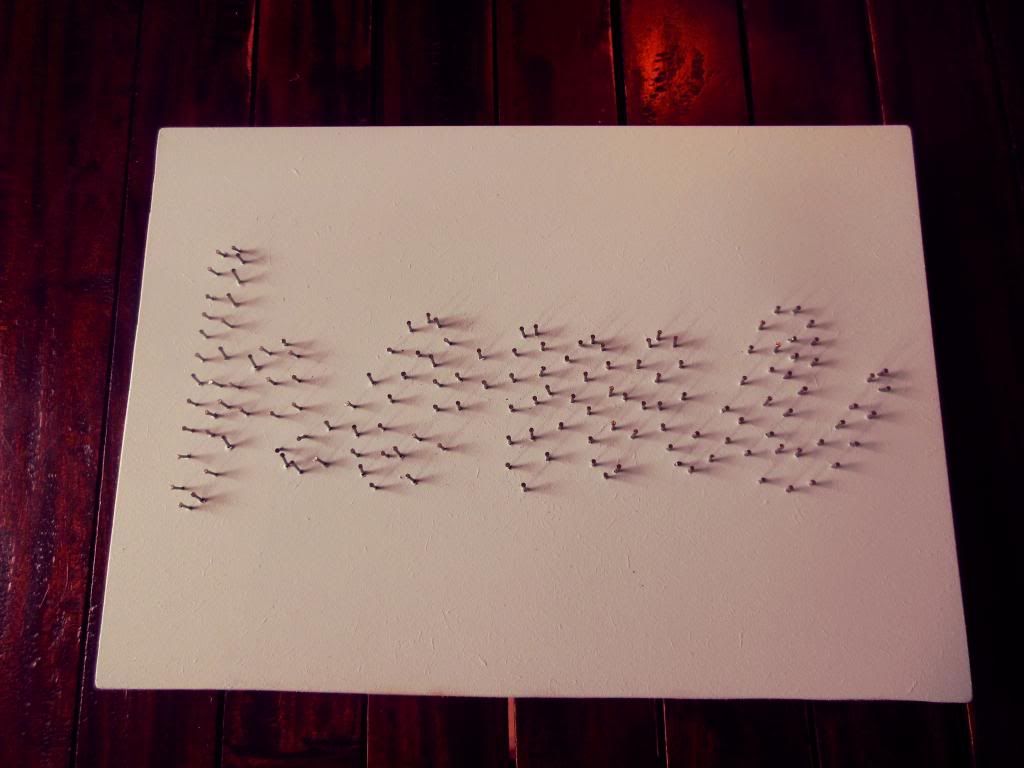
When you have all your nails in place, remove the tape and gently rip away the paper. It should look like something like this. You should be able te make out the pattern you decided to use for this project. Check the nails to see if they are all somewhat even. If you have some nails sticking out too much, this is the time to give them en extra slam and correct it.

Next up you take the yarn and tie it to one of the nails to secure it. You want to start with outlining the pattern before you start filling it in. Do this this by taking the string and wrapping it around a nail once and than go on to the next nail to do the same and so on.
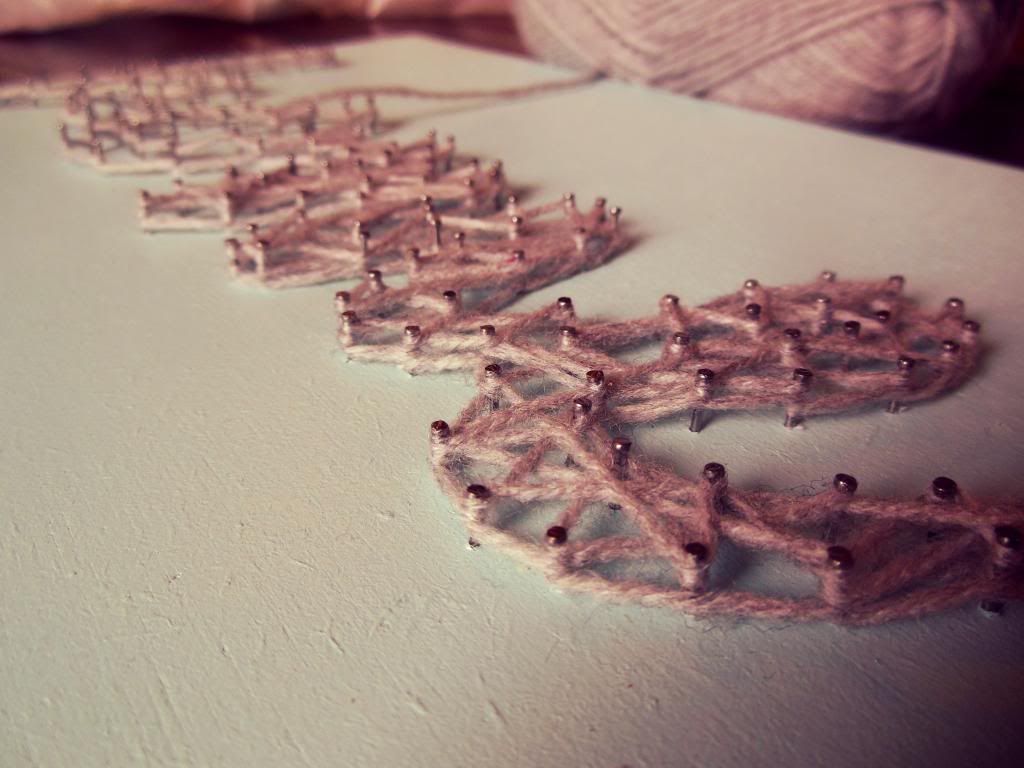
When you've outlined your pattern correctly, it's time to fill it in. You use the same technique you used while outlining it. The only difference is that you don't just go on to the next nail, you criss-cross the yarn through the pattern like demontrated in the picture above. You can do this as often as you want. The more often you do this, the bulkier it will look. When you're done, wrap it up by tying the yarn to a nail to secure it and tuck the last string of yarn in with the other strings and voilà! Your nail and string art is done!
Do you have any fun ideas for nail string art? Let me know! I have some supplies left and I would hate to let them go to waste!
Kisses!
Nice, I remember doing string art years and years ago.
ReplyDeleteOMG!!!! Great idea, wonderful share must pass forward :)
ReplyDeleteHi Tessa! This is such a beautiful DIY project.
ReplyDeleteI am visiting from Bloggy Moms. I am now following you on GFC & Bloglovin' I'd love for you to visit my blog. If you have a moment you can visit me here: http://ylindo01.blogspot.com/
I look forward to following your posts!
Thank you ladies! And Yaumara, I'm already way ahead of you! I already found your lovely blog and have been following it ever since! :)
ReplyDeleteLove,
Tessa Loves Charlotte